Come to the Table

Note: This post is in support of Near East brand's Couscous for a Cause campaign. I was already a fan of their products, but thanks to this couscous-inspired post, they're donating 250 boxes of couscous to Washington state's hunger relief agency, Northwest Harvest.

PRIZES! Comment by May 15th for a chance to win a Near East prize pack including products, recipes and another 250 boxes of couscous donated to Northwest harvest.


According to Wikipedia, couscous is a staple food throughout West Africa, Sahel, France, Spain, and the Canary Islands, Portugal, Madeira, Italy (particularly in the western Sicily Province of Trapani), as well as in Turkey, Greece, Malta, Cyprus, the Middle East and India.

Made by hand, it's a lenghty process that involves working semolina-based dough through a sieve, which forms the tiny granules of couscous. The couscous grains are then air-dried in the sun. Preparation involves steaming the tiny grains in a special pot, typically lined with a cheese cloth.

Here in the Western world, couscous is pre-steamed and dried again, which shortens the cooking time considerably--five minutes from boiling water (or stock) to fluffy couscous!

I love entertaining with couscous. When I gather friends, we serve it North African-style with a meat or vegetable stew, spooned over a heaping mound of couscous. (Near East brand's roasted garlic or parmesan are my two favorites.) Served on polished silver trays, it makes a stunning crowd-friendly presentation.


Fresh thyme and green olives are added to the couscous.


Preparing the trays for dinner.


Mounding the couscous for height....enhances the presentation.


Don't you love these trays? I'm an avid thrift store shopper and both of these trays were less than $10. Silver polish and a bit of elbow grease brought them back to life.


Layer the dish with poached artichokes, onion and lemon.


Add a light drizzle of the pan juices...


All natural lamb loin from Ninety Farms, with a beautiful Moroccan spice rub.


Strips of seared lamb crown the dish.


***

More ideas? Check out these recipes by
James Beard Award-winning chef, Jason Wilson:


with eggplant, zucchini, and chopped tomato

Couscous Chicken Crunch
with apple, pear, and sage

Pacific Albacore Tuna
with olive and lemon


Smoky Couscous with Cherry, Sage, and Pulled Pork
chipotle chile, balsamic, and beer make up the braising liquid for the pork, and the couscous is tossed with dried cherries and sage. Sounds lovely, no?

***

Photos by food photographer, Rina Jordan.

Obsession #143 and James Beard's County Fair Bread

There's a Seattle area school that is more Outward Bound than P.S. 52. Its focuses on an experiential education, based on the premise that teachable moments become embedded when they are experienced. That's my kind of school.

I learn by doing. I read obsessively about topics, experiment, and read some more. And then I consult the experts. By that point, I've read and experienced enough to have a meaningful conversation.

Lifelong friends have seen the various incarnations. It began with a horse fetish. At five, I was sneaking out of the house to visit a neighbor's horse, and followed that obsession well into my teens.

My ice cream obsession led to...a professional machine with built-in compressor (to churn batch after batch -- no freezing the bowl between batches) and 100+ tried & true recipes. When my obsession hit a fever pitch, I consulted with food scientist Shirley Corriher and Alice Medrich on the role of starch in ice cream.

You see?

It's like that.

For years, I've been a bread baker voyeur. I've taken classes with experts in the field, traveled to famous bakeries all over the world, toured wheat farms, read textbooks and countless books on baking, and have staged alongside the captain of the world champion baking team.

But I never made my own bread.

I just watched, and read.

A lot.

Last week, I took the plunge and made my first yeasted loaf. Inspired by this hauntingly delicious challah, I attempted my own. The results were passable but nothing like the challah she made. It lacked the depth of flavor that is the hallmark of a slow rise.

I tried again, armed with an intriguing recipe by James Beard. Instead of mixing the water, yeast and a bit of sugar and waiting for the yeast to work its magic, Beard's recipe jumps right in and adds it all together...liquid, yeast and flour. The addition of eggs and milk enrich the flavor substantially, and sesame seeds scattered across the top, toast beautifully.

Already my mind was spinning with possibilities. What if I replaced the water with something more flavorful, like onion stock? What if I chilled the dough between risings? This recipe calls for only two risings, but I have another recipe that calls for four. How would that change the final outcome?

You see? The genie is out of the bottle, and my bread obsession is in full swing. If you find a loaf of bread on your doorstep, that's me...parsing out experiments.


***Many thanks to Charlie for sharing this recipe. As he notes, if you're new to baking, it's a great bread for beginners.

County Fair Bread

Recipe By: James Beard, Beard On Bread


Ingredients:

5 cups all-purpose flour, or unbleached hard-wheat
1/4 cup granulated sugar
2 teaspoons salt
1 package active dry yeast
1 1/2 cups milk
1/2 stick butter, cut into 1-inch cubes
2 eggs
1 egg white, lightly beaten with 1 tablespoon of water
sesame seeds

Directions:

In a large mixing bowl combine 1 Cup of the flour, the sugar, salt, and dry yeast.

Heat the milk and the butter in a saucepan, just until the milk is warm; the butter does not need to melt.

Add the eggs and the warm milk mixture to the flour mixture. (This, as you will notice, is one of those newish dry-mix processes where you do not proof the yeast first-and it works.)

Mix very well until thoroughly moistened, and beat with a wooden spoon for about 5 min. Then stir in the remaining flour to form a stiff dough.

Turn out on a floured board, and knead the dough until it is quite smooth and elastic, about 5 min. Work into a ball, place in a buttered bowl, and turn to coat with butter on all sides. Cover and let rise in a warm, draft-free place until light and doubled in bulk, 1 to 1 1/2 hrs.

Punch the dough down and divide into six equal portions. Roll each of these portions into a thin cylinder about 8 to 10 in. long. Take three strips and braid them together. Place the braid on a baking sheet buttered or sprinkled with cornmeal. Braid the remaining three strips and place about 6 in. away from the other loaf. (For a more spectacular loaf, make a braid of three large strips and then a braid of three smaller strips, and put one on top of the other. This takes a good hr. to bake and a slight amount of dexterity to shape.)

Cover the loaves and let rise in a warm, draft-free space until doubled in bulk, which will take another 1 1/2 hrs.

Brush with the egg white and water, sprinkle lavishly with sesame seeds, and bake in a preheated 375 deg. oven for 35 to 40 min. or till golden brown.

Signature Dishes and Tessa's Chickpea, Feta, and Cilantro Salad


I've always admired women who have been cooking for years. They glide effortlessly through the kitchen, anticipating their next move well in advance. Armed with a killer collection of recipes--tried and true, and terrific crowd pleasers, they exude a "knowingness" that only time and experience can provide.

Over time, certain recipes weave themselves into your identity. When I was growing up, our neighbor, Kay, made the best cakes. I'll never forget the Barbie cake she made when I turned five. Barbie stood proudly erect, skirted by a dome of pink and green frosting. She may have made it for me, but that was Kay's cake, and everyone knew it.

When I think of my friend Kathy, I'm instantly transported to a spot in her kitchen. Deep in conversation about the latest New Yorker, literacy in America, or West Coast restaurant launches, we talk late into the night, buoyed by one of her famous margaritas in one hand, and a crunchy scallop fritter in the other!

And Naomi? Words cannot describe how incredible her food is. While her tamales are the stuff of legend, I've got big love for her empanadas. I leave Naomi's table with such pleasure....it's a dining experience like no other, and one that reverberates with me for days.

Now, imagine traveling around the world, collecting recipes from friends and relatives along the way. In my mind, I picture Tessa's notebook splattered, doodled in from front to back, and barely holding together. Each recipe has a story and transports you back to a particular time and place. Her book, Falling Cloudberries is exactly that, and I treasure it dearly.

My own collection of recipes includes a page from her book.


Tessa's Chickpea, Feta and Cilantro Salad makes frequent appearances both at home and for social occasions. It travels well, is easily doubled, and if there are dietary restrictions in the crowd? I've got it covered. Vegetarian? Yep. Gluten-free? Check!

Simple and yet packed with flavor, this salad has become one of my signature dishes. For an entree version, I line a platter with fresh spinach or romaine, add the chickpea salad, and top it with grilled shrimp or chicken.


Chickpea, Feta and Cilantro Salad
From Falling Cloudberries, by Tessa Kiros

1 (14-ounce) can chickpeas, drained and rinsed well
1 cup olive oil
1 large red onion, chopped
5 garlic cloves, very finely chopped
1 or 2 red chiles, seeded and finely chopped
1 2/3 cups crumbled feta cheese*
4 scallions, green part only, chopped
1/2 cup chopped fresh cilantro
1 cup chopped fresh Italian parsley
Juice of 1 lemon

Heat 3 tablespoons of the olive oil and fry the red onion gently until it is cooked through and lightly golden. Add the garlic and chile and cook for a few more seconds, until you can smell the garlic. Take care not to brown the garlic. Let cool completely.

Add the chickpeas, feta, scallion, cilantro, parsley, and lemon juice and season with pepper and a pinch more salt, if needed. Add the cooled garlic oil and the remaining olive oil and mix very well.

* Fetas can vary in their punch. I toss all the ingredients together, adding the feta last. Rarely do I use the entire amount specified here. Another tip: go easy on the salt until you know how much feta you'll be using.

Confronting My Beliefs


My photos are embedded with simple date stamp:

April 23, 2010.

Impersonal and detached, it reveals none of the emotions that have smoldered since then....


Last spring, I was invited on a 3 day food and farm media trip and until this stop, I had bucolic visions of lavender farms and cow-to-curd cheese makers. Five of us would pile in the van, and in near unison, agree each stop was more delicious than the last.

While I was raised in the Midwest surrounded by major plots of farmland, my family is several generations removed from this life. I don't pretend to understand the difficult choices one makes to maintain a viable farm. I make no judgments. This is how you choose to run your business. I'm just here to learn.

And yet...on April 23, 2010, my aspirational beliefs...took a swift hit to the gut.


The five of us, plus our hosts, headed into the tasting room.


On this farm, they raise both goats and jersey cows for milk production. An army of toothpick-skewered cheese samples stood before us.

The cheese writer tossed her toothpick in the waste bin, and noted the distinct "off" flavor in their goat cheese. When asked about it, she explained, "When male goats aren't separated from lactating females, the phermones get into the milk and make it taste super goaty." She summed, "It's why a lot of people don't like goat cheese, I think. It's pretty mean."

As our group headed into the barn, I made a mental note.


Baby goats! An attempt to pet them, turned into a suckling fest. Fingers are a poor substitute for milky mama teets, but I was giggling like a schoolgirl here.


The adult goats were extremely curious...and made every attempt to nibble at my notebook. Deep in my baby goat euphoria, it took a moment to register....

What's wrong with this picture?


This goat...has no horns!

As she lunges for my notebook, I get a closer look:


A view from above: the goat's head


I asked about their hornless goats. The farmer tells me, he and his daughter recently removed the horns from his entire herd. Nonchalantly, he explained: they put the goat to sleep, then used a hairpin-shaped branding iron to remove the horns, and cauterize the wound. Cauterizing (burning) the wound does two things: 1. It stops the bleeding. 2. And it prevents the horns from growing back.

I could not get this image out of my mind.

***
Over the course of several months, I began researching this process. Normally dehorning is done early in a goat's life, typically in the first two weeks. (WARNING: Graphic video.)


However, in the adult stage, two nerves and a series of arteries run through the horns. Not only is horn removal in adult goats significantly more painful, it creates holes in the skull, leaving the brain exposed to dust and potential fly larva infestations. The skull eventually heals, but it's a slow process.

The adult dehorning process, as explained by Dan Miller, DMV, PhD:

To dehorn an adult animal, chemical restraint is necessary.

Use either a flexible hacksaw or, preferably, obstetrical wire to remove the horn at its base, including a circle of skin completely surrounding the base of the horn. This allows you to make a cut that follows the curvature of the skull thereby decreasing the chances of entering the brain cavity. Make sure you remove at least a thin strip of skin from all around the base. If any of this germinal tissue remains, it will produce scurs.


In the skin between and slightly behind the horns are the two musk glands responsible for the characteristic buck odor. Unless one wants the buck to smell good to the does, these glands are also removed at dehorning/disbudding.

In removing the horn you will cut several arteries that run within the bone itself. Grasp these arteries with a forceps and pull them until they break off inside the bone. The clot that forms will prevent further bleeding. You will have created a hole into the frontal sinus. Cover or plug the hole with clean gauze that is changed daily until the wound heals.

At the point where the horn is attached to the skull there are two full layers or sheets of bone forming the roof and floor of the frontal sinus. Immediately under the floor of the frontal sinus is the brain cavity. Since the base of the goat horn is so broad, a flat plane that would remove enough germinal tissue to prevent scur formation would also remove a piece of the brain. Therefore, the cut needs to be curved so that only the outer layer of the skull is removed.

This hole will require a long time to heal shut, but eventually it will fill with bone and be covered with skin. For this reason dehorning is best done soon after the fly season is over to prevent fly maggots from appearing on the wound or in the sinus. Another reason to keep it covered is to prevent dust and hay chaff from falling into the sinus cavity and causing an infection.


All evidence suggests dehorning young goats is the preferred method, yet I'm wondering why this is a common practice. Am I just a naive city girl, shielded from the reality of livestock rearing?

I have no problem watching butchers cut animals into edible pieces, and once helped saw a pig skull in half. But these animals were dead.

Dehorning live animals?

It's an acceptable practice...but should it be?

---
This post was featured on Food News Journal's "Best of the Blogs"


Pancetta Wrapped Barbecue Prawns with Cornbread Stuffing

25 amazing restaurants, countless delicious bites. At the Seattle Food & Wine Experience, remember this one?


Not only did I rave about sous chef John Jadamec's dish, there was some shameless recipe begging going on here!


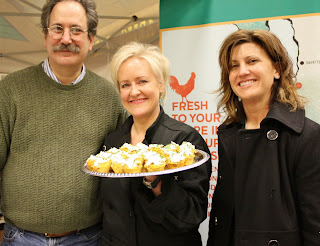
He quietly reached in his pocket and offered this list of ingredients.

"No, man, I need a recipe!"

We ended the night with a handshake...and a promise.


True to his word, on Friday, this coveted recipe landed in my e-mail. John notes, "The original recipe was for 1,000 pieces and I scaled it down to about 1 dozen for you." I've got big love for this guy!

If you're on the hunt for a showstopper that's packed with flavor...look no further.


Pancetta Wrapped Barbecue Prawns with Cornbread Stuffing

Courtesy of John Jadamec, sous chef, Eagles Buffet at the Tulalip Resort Casino & Spa

Poppy notes: This recipe involves multiple parts but the work is easily divided, and most of it is done in advance. Day 1: Make the sauce, cornbread for the dressing, and marinate prawns in the spice blend. Day 2: Make the cornbread dressing, wrap the marinated prawns in pancetta and quickly cook them. Serve prawns with a drizzle of sauce and top with the cornbread stuffing. In the final moments, this dish comes together in a flash! It's the perfect party dish.


White BBQ sauce:

2 c

mayo

1c

apple cider vinegar

2 Tbl

lemon juice

3 Tbl

black pepper

1 tea

salt

1/2 tea

cayenne

1/2 c

garlic

Mix everything together and chill overnight.

Shrimp Seasoning:

1 TBL

chili powder

1 tea

blackened seasoning

1/2 tea

cayenne pepper

1 tea

salt

2 tea

black pepper

1 TBL

paprika

3 TBL

olive oil

1. Mix all dry spices together.

2. Pour olive oil over shrimp and mix in

3. Mix the shrimp with the dry spices and chill overnight in the fridge.


Cornbread:
1 pound unsalted butter
11 oz or about 1 2/3 cup sugar
8 each eggs
26 oz. creamed corn
1/2 lb. cheddar cheese
1/2 cup heavy cream
11 oz. or 1 2/3 cup bread flour
14 oz. or 1 3/4 cup corn meal
2 oz. or 1/4 cup baking powder
2 tsp. Kosher salt

1. Cream butter and sugar

2. Mix in eggs one at a time

3. Mix in the everything else

4. Line a baking pan with parchment paper or lightly oil, pour mix in to pan until about 1/2 deep.

5. Bake at 350F for about 30 minutes or until it turns golden brown and poke with a tooth pick; it should come out clean.


Corn bread dressing:

3 cups

corn bread crumbles

1/4 cup

fine dice onion

1/4 cup

fine dice celery

1/4 cup

fine dice red bell pepper

3/4 cup

diced raw bacon, smoked bacon is best. I used apple wood smoked

1/4 cup

green onion sliced in thin rings

2 TBL

butter, no salt

to taste

kosher salt

1. cook bacon until crispy in a large sauté pan. Remove bacon from pan and drain the grease out. Don't clean the pan, just drain most of the grease out.

2. melt the butter in the bacon pan then add the onions, celery and bell peppers and sauté for

about 1 minute, I like to keep the veg bright and crisp not over cooked.

3. turn heat off and add the corn bread and bacon then mix in.

4. mix in the green onions.

Pancetta:

This needs to be sliced really thin, about as thick as 3-4 sheets of paper. You need as many slices as shrimp you want to make. If you can have them slice it at the store on a slicer. It sliced best when it's frozen, on a slicer.

Kaiware sprouts, for garnish

1 lb 13/15 shrimp, peeled and deveined

To make the dish:

1. unroll the pancetta the best you can and wrap them around the seasoned shrimp.

2. heat a sauté pan and sauté the shrimp in a pan with just a little oil. Cook the shrimp on one side until the pancetta turns brown then flip it over and cook the other side until it turns brown. Cook for about 2-3 minutes or until the shrimp is cooked through.

3. put the cooked shrimp on a plate, drizzle the white BBQ sauce across, top with warm corn bread dressing.

4. garnish with 2 or 3 Kaiware sprouts

Kathy Casey’s Recipe for Savory Bacon “Cupcakes” with Tabasco Cream Cheese Frosting

When I spotted celebrity chef Kathy Casey at the Seattle Food & Wine Experience, she was deep in autograph mode. Holding court in the Foster Farms Chicken booth, Kathy was signing copies of her book, The Northwest Table. The line was 50 people deep! I waved a quick hello and decided to come back later. (See my Seattle Food & Wine Experience recap here. Photos galore!)


Later...meant peeling Kathy away from a never ending line of fans. But waiting has its rewards! I happily parked myself over a tray of these Savory Bacon "Cupcakes" with Tabasco Cream Cheese Frosting. Sponsored by Foster Farms Chicken, see the map in the back? The red dots represent farmers under the Foster Farm's banner. As a grocery store staple, I had no idea the bulk of their operation was Northwest-driven.


I've never been on a chicken farm and took an opportunity to request...field trip? Hopefully we'll have a date later this year, and I'm guessing these folks will have a hand in that. At the Foster Farms Chicken booth: (L-R) Ira Brill, Foster Farms Director of Marketing and Advertising Services; Chef/Author Kathy Casey from Kathy Casey Food Studios; Heidi White, Fineman PR for Foster Farms.


Oh, man, these Savory Bacon "Cupcakes" are amazing! Minced chicken and bacon add a hearty flavor, while the batter is uncommonly moist and tender. Kathy shared her recipe and frankly, they should come with a word of warning....


...it's impossible to eat just one. Prepare for raving fans!


Kathy Casey’s
Savory Foster Farms & Bacon “Cupcakes”
with Tabasco Cream Cheese Frosting

Makes about 24

Cupcakes
1 cup small diced Foster Farms chicken raw breast (12 ounces wt.)
3 tablespoons butter
1/2 cup each 1/8-inch-diced onion, celery and red bell pepper
1 Tbsp. minced garlic
3/4 cup cornmeal
1/2 cup all-purpose flour
1 1/2 Tbsp. sugar
2 tsp. baking powder
1 Tbsp. Old Bay seasoning
2 eggs
1/3 cup whole milk
1/3 cup sour cream
1/2 cup frozen corn kernels, thawed and drained well
8 strips cooked bacon, chopped fine (about 1/2 cup chopped)


Frosting
4 - ounce cream cheese, at room temperature
1 1/2 Tbsp. milk
1 tsp. Tabasco sauce

Garnish
2 thinly sliced green onions


Preheat an oven to 350 degrees F.


To make the cupcakes:
Spray nonstick mini-muffin tins with cooking spray. Set aside.

Cut chicken breast into 1/4-inch small pieces. In a small skillet or sauté pan over medium heat, melt the butter. Add the chicken breast and sauté for about 3 minutes moving around the pan with a spoon. When chicken is three-quarters cooked then add the onion, celery, and bell pepper for about 3 to 4 minutes more, until vegetables are just starting to get tender. Add the garlic and sauté about 30 seconds more. Let cool.

Meanwhile, in a small bowl, whisk together the cornmeal, flour, sugar, baking powder, and Old Bay seasoning; set aside. In a large bowl, whisk together the egg, milk, and sour cream.

Once the cooked mixture is cooled, add the cornmeal mixture to the egg mixture and mix lightly. Fold in the drained corn, bacon, and cooked and vegetables. Do not overmix; fold in just until evenly distributed.

Divide batter between the prepared mini muffin cups, fill to the top – you will get about 24 cupcakes. Bake the cupcakes for about 22 minutes or until a toothpick inserted in cupcake center comes out clean.

Let the cupcakes cool in the pan for about 5 minutes, then carefully remove them from the pan and let cool briefly on a wire rack before frosting. The cupcakes can be made up to 1 day in advance, covered, and refrigerated before frosting. Refrigeration is imperative if making in advance. (Poppy’s note self: duh! There’s chicken inside. Keep cupcakes refrigerated!) If reheating cupcakes, warm them for minute or so in a 350-degree F oven before frosting.

To make the frosting:
In a small bowl, mash the cream cheese with a fork, then whisk in the milk and Tabasco until smooth and creamy. Top each cupcake with about 1 teaspoon of frosting then sprinkle with green onion for garnish. Serve warm.

© 2011 by Kathy Casey Food Studios® - Liquid Kitchen™ www.kathycasey.com

Ode to the Emerald City

Dark days. Endless rain. The mere threat of snow can shut the city down. When Seattlelites gush about their city, it's hard for others to wrap their brain around it.

Ah, but there's more...so much more! If you've never been here on a sunny summer day, you've missed one of life's truly great pleasures.

Fantasize all you want about Paris.

In August?

Seattle's the place you want to be.

Emerald City - A Scenic Short Film from KMP VIDEO Chicago on Vimeo.

Deep Feast Writing Workshop with James Beard Award-winning Author

Writing is by far, one of the most difficult things I do. I stare at the blank screen and...nothing. I've got nothing. I pop on Twitter, pet the cat, stretch, and force myself back to the computer, praying for inspiration.

And then there are days, the words flow so effortlessly, I mock my self-conscious side, "What's the big deal?"

The dueling sides battle it out on a regular basis, each one fighting for dominance. Fortunately, I've got a set of tools to help me through the process. How?

I've got a mentor.

A list of Crescent Dragonwagon's former students read like a "Who's who in food" -- Julia Child, Alice Medrich, you get the idea. Like them, I've traveled far and wide for her classes--jetting to San Diego for a workshop, visiting her home in Vermont, and attending a class or two here in Seattle. It's safe to say, I'm not sure I'd be writing today if it weren't for her.

Sunday, she's teaching a writing workshop in Seattle, and I hope you'll join us. Space is limited; Register here.

More on her workshop:

DEEP FEAST: Writing the World Through Food

With ever more writers, bloggers and photographers who focus on food as such, those who seek their own distinctive voice in culinary writingmust discover what larger food story or stories they want to tell --- stories that go beyond food per se; stories that they and only they can tell.
  • find your voice & rhythm in writing about food
  • expand your vision of what culinary writing is & can be
  • unearth your inimitable one-of-a-kind point-of-view
  • stop aw-shucks-ing/dissing yourself ("I'm just a food writer")
  • use your own singular experiences
  • discover (& start telling, & writing) your own stories

Like all travel, it's a journey full of surprises, rooted in discovery, connection. It's a deep feast.